
QR Code:
QR code means, Quick Response Code. It is a better way to store all kinds of data in a small space. A single QR code can store up to 4000 characters. You can easily create 2D barcodes using the following steps:
QR Code
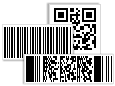
How to generate 2D barcode labels with different shapes and sizes ?
Include following details while generating barcode labels using QR Code Font:
- Data Source : Choose Data Source as Manual or Batch Processing series accordingly.
- Select Barcode Font : Select the Databar barcode font.
- Barcode Value : Enter the Barcode Value.
- Message Append : Specify the message appended across multiple symbols if Number of Symbols is greater than 1.
- Barcode Header : Enter the Barcode Header details.
- Barcode Footer : Enter the Barcode Footer details.
- Align Header : Set the Barcode Header to "Left, Center or Right".
- Align Footer : Set the Barcode Footer to "Left, Center or Right".
- Number of Symbols : Select number of symbols.
- Error Correction Level : Select Error correction Level Value.
- QR Code Reader Initialization : Select if reader initialization symbol requires.
- Hide Barcode Header : Select to Hide Barcode Header.
- Hide Barcode Footer : Select to Hide Barcode Footer.
You can also change the Barcode Settings using following tabs:
♦ Barcode Input Data
♦ Barcode Settings
♦ Barcode Color Option
General Settings:

QR Code barcode
General Settings tab includes following options:
- Header Margin (cm) : Set the Header Margin.
- Footer Margin (cm) : Set the Footer Margin.
- Left and Right Margin (cm) : Set the Left and Right Margin.
- Top and Bottom Margin (cm) : Set the Top and Bottom Margin.
- X- Dimension : Set X dimension margin.
Font Settings:

QR Code barcode maker
Font Settings tab includes following options :
- Barcode Header Font : Set Barcode Header Font color.
- Barcode Footer Font : Option to choose Barcode Footer font.
How to design Linear and 2D barcode fonts to generate inventory and retail labels?
Color Settings:

QR Code Barcode Generator
Color Settings tab includes following options :
- Barcode Color : Set the Header Margin.
- Barcode Background Color : Select the Barcode Background Color.
- Barcode Header Color : Select the Barcode Header Color.
- Barcode Footer Color : Select the Barcode Footer Color.
Image Settings:

Create 2D barcode font
Image Settings tab includes following options:
- Bitmap : (Bitmap is the type of image format used to store digital images)
- Resolution Independent Metafile : (Resolution Independent Metafile is a high resolution image file format to save the barcode label)
- Image DPI : Enter the Image DPI (Dots Per Inch) value while you copy or save barcode image.
- Orientation : Rotate the barcode image in 0, 90, 180, 270 degrees.
Note : Image DPI value changes are only applicable when Image Type "Bitmap" is selected.
